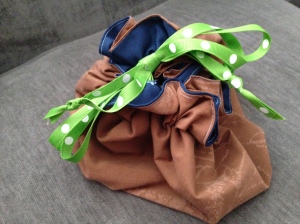
Parade Flags


Quick Independence Day Parade FlagsParade Flags


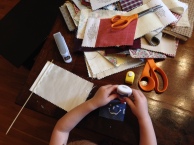
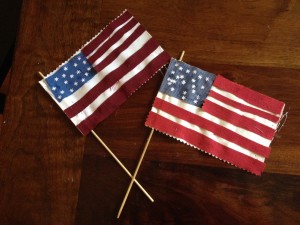
We just made last minute plans to attend a Independence Day parade. I thought it would be fun to take some flags for the kids to wave to participate a bit.  We didn’t have any, nor time to pick some up, so I scrounged up some supplies to make some.  It was fun and simple and only took us 45 minutes from deciding to make them to finish.

Supplies:

Supplies

  • Red, White, Blue upholstery samples or sturdy fabric scraps (we got a book of these for free before they were thrown in the trash). Paper works too but material is easier to wave.
  • 1 bamboo skewer with point clipped off or small dowel rod
  • craft glue
  • hot glue gun (or stapler)
  • fabric scissors
  • star punch
  • 1 piece of scrap computer paper
  • Fray check (found at sewing stores) or pinking shears

Instructions:

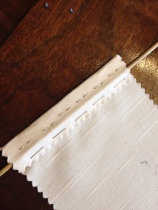
Each of the fabric samples had a paper label on it. We folded this part in half (just enough to hide it) and then used staples to create a casing for the skewer. You can also fold over the skewer and hot glue. That would probably be easier but this was kind of a spur of the moment craft and mine glue gun was in with the sleeping baby.  Thus the stapler.

stapled casing for pole

Next I drew lines for the kids to cut out a blue square and red stripes.  For little kids who can’t manage fabric scissors you can precut. I punched out stars out of craft paper while they were doing that and then they glued it all together. Smily face glue drops not required. She’s so cute with all her small, little details.

Once they finished I trimmed up any fly-away threads on the edges and applied a bit of fray-check. You can also use pinking shears to trim the edges. I happened to have some fray check left over from another project so I used that for a bit of extra hold.

These ended up looking much nicer than I thought! You could even make some for a quick touch of patriotic spirit to your mantle or front door wreath.

Happy Independence Day!

Attic Remodel: Finished!

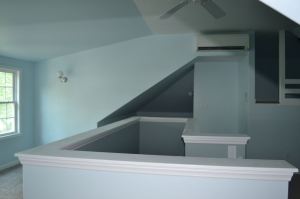
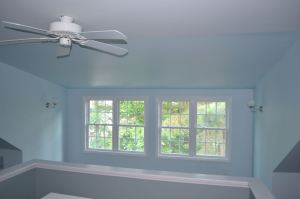
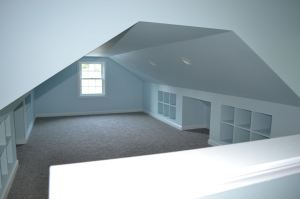
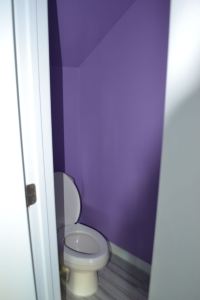
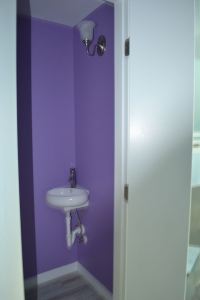
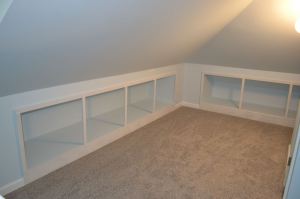
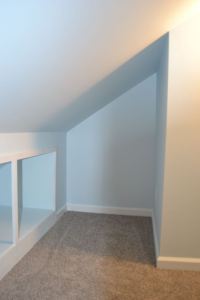
We passed our final inspection and other than cabinet doors, a few paint touch ups, and loft ladders our attic space is finished! Our general theme was “outdoorsy” with blues, grays, and whites. Something calming and pleasing to look at for us but fun for the kids.  We went with blue as the main color since we wanted a “sky” background for the murals we plan to add.  And, as you will notice, we broke the normal theme with the (very) purple bathroom as promised to some wide-eyed, hopeful looking little faces.  We used a darker purple so we can accent with a soft pale pink. Here are the after pictures followed by some tips, resources, and supplies we used along the way. (before pictures)

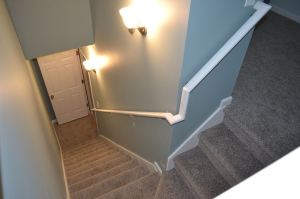
stairs


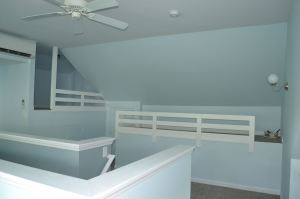
Lofts

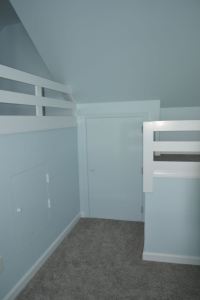
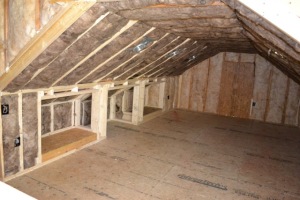
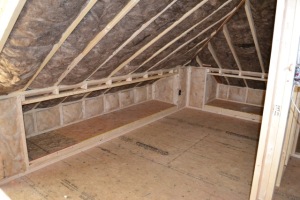
Carpeted Play Lofts. The taller one fits a double mattress and the lower one a twin. Just in case we want to turn them into beds one day.

DSC_0121

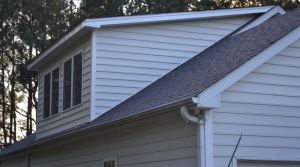
Dormer

Main room; this blue is more true to the actual color. The other pics look too green.

Play Nook

Play Nook


Bathroom

Double doors to the purple bathroom sans handles

DSC_0116 DSC_0117

—-little details—–

DSC_0120

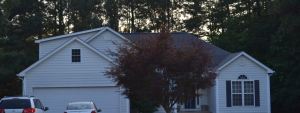
New House Front!

DSC_0119


cabinets

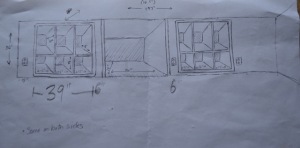
storage cabinets sans doors

DSC_0102

Storage nook to left of bathroom.

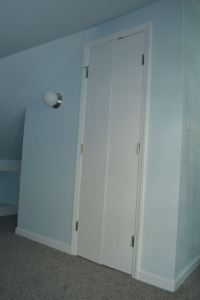
Attic Access Door

Access door for unfinished attic space

—-Specs—-

Paint:

  • Trim: Sherwin-Williams Extra White
  • Room: S-W Iceberg
  • Stairwell: S-W Breezy
  • Bathroom: S-W Potentially Purple (nothing potential about it folks, it’s PURPLE!).
  • Finish for all: Washable Flat Enamel Paint. Cleanable but easy to touch up and patch if necessary.
  • How to Paint Angled Walls and Sloped ceilings,This blog post is why we painted it all blue instead of different colors. We wanted clean lines and love the calm feeling it gives to a space that kids will go crazy in.
  • The DIY Network‘s blog post of 16 Amazing Attic Remodels has some good examples of attics that are all one color.


Carpet: We went with Phenix Anchor Bay N164. It’s a poly-blend that rated high on the cleanable list. We went with the Gray Silk 201 color that is marbled in hopes that stains will just blend in. It’s low pile and soft making it super comfortable to roll around on with the kids.

carpet


Attic Update: Taking Shape

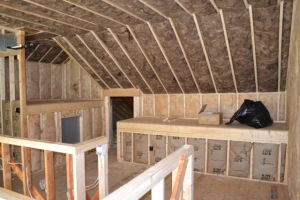
Our house has been humming the last month with progress.  We’ve passed the initial round of inspections and the drywalling begins this week. Our contractor has been fantastic about clarifying what we want things to look like as we go and this space is turning out to be exactly what we envisioned!

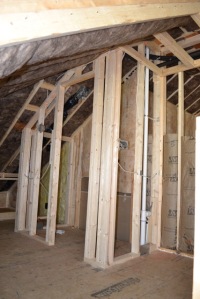
Lofts: Remember the peaks? Instead of just walling straight up we built lofts over them. I love the open, multi level look it adds into the room. And the fact that we redeemed a potential “wasted space” area (one of my favorite shows).  They will have bunk-bed style railings and carpet so that we can use them as loft beds or extra play nooks. The taller loft has it’s own ceiling light as well as storage underneath. There will be flooring placed to hide the insulation and then we will use this space for storing camping gear plus other things that are currently off-season: like our heavy coats and our beach travel bag. The taller door between the lofts is the access point for the rest of the attic.

loft bedsIMG_0502

Tip: On the topic of storage, it was really helpful during the plan-drawing phase to list exactly what we wanted to store up there and where. It helped a lot to have that in mind when discussing where we wanted built in storage.  I even went ahead and picked out the bins I wanted to use for toy storage.  I didn’t purchase them (just in case the plans had to adjust) but I knew which ones I wanted.

Play Nook: We were inspired by this room and the placement of shelves and can lights. We wrote out specific dimensions that were not on the official plans, just to make sure we were all on the same page. We’re planning to use the new light bulbs that don’t put off heat since the ceiling is so low.

play space DSC_0021

Storage – Back wall: seasonal decorations and clothes. Left side: craft+homeschool+event decorations.

DSC_0029

Half-Bathroom: We’re using a corner, wall mounted sink to be able to fit a bathroom in this space.

DSC_0032

Each individual space has it’s own wall light and switch (again, we wrote directly on the plans where we wanted them). It gives us options but really with all the odd angles there was no other way to make sure we had good lighting in all the corners.  However, we didn’t want to have to walk all the way around the room to turn them off. We had the electrician put all but three of the light and fan switches on the corner wall to the right of the bathroom above. This way we can turn them all off or on in one spot. The stairway, bathroom, and play nook have their own localized switches.

Activity Space: This is where we’ll put a small kitchen table we can use for games, crafts, and school.

dormer

Almost there!

Attic Dormer: check

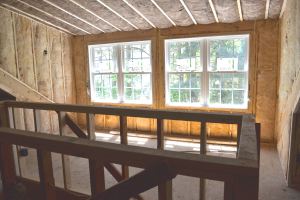
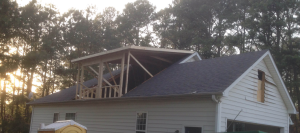
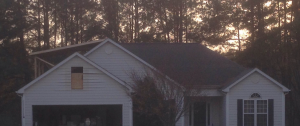
We are now two weeks into our attic makeover and so far our bathroom roof was leveled and the dormer was inserted. The rest of the interior framing is almost finished and next week starts all the plumbing and electrical work.

I’ve been pinning ideas like crazy. Our goal is to blend crazy fun and creative with a feeling of quiet reflection. We want subtle creativity that doesn’t send your sensory panel into overdrive.  By choosing our colors and textures and artwork carefully I think we can do it!

This past weekend my husband surprised me with a weekend trip to NYC to see Les Mis on Broadway for our anniversary.  I was completely wowed, by the show and the fact that we went! It was a great, relaxing time away. We have so much fun traveling together.  This is relative, I promise: while we were there we walked through Macy’s Art in Bloom Show and visited The Met (it was cold people! Too cold for this southern girl to be outside!). You will definitely be seeing some wall murals and/or art work inspired by what we saw.

dormer

Screen Shot 2015-04-04 at 9.56.36 AM

IMG_0335

(in front of the right window is where our bathroom’s peak used to be. I didn’t take any before pictures of the inside of our bathroom)

Attic Remodel: Before Pictures

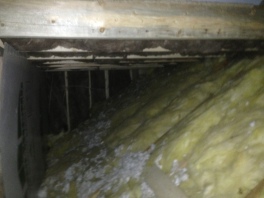
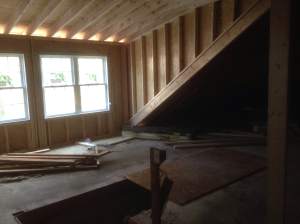
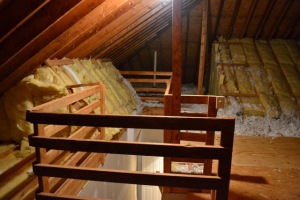
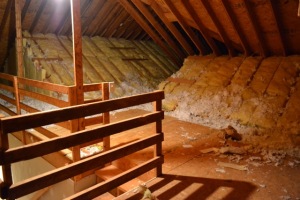
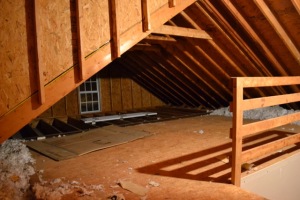
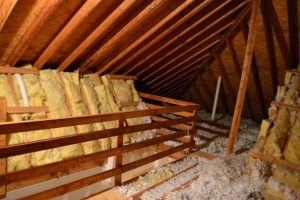
Take a good look at the front half of our attic! We’ve saved, we’ve finalized plans, and this week construction starts to transform this space into a bonus/playroom.   So excited! While I’ve enjoyed our little one-story house our girls have out-grown the little play nook we currently have set up. We’ve talked about finishing off this space for the last couple of years and it’s finally happening!

On the plans: Lots of play space, dormer window, loft beds over the peaks, a half bathroom, and cabinets for seasonal decoration and clothing storage.

Have I mentioned I’m excited?!

Stay tuned for progress pics.

DSC_0032Attic Before DSC_0027DSC_0036

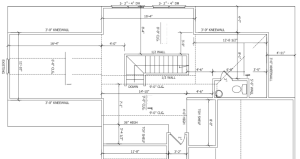
Plans:
Credit: Tyndall Engineering & Design, P.A.

Attic plans

Fall Party Time!

I’ve had several posts in the making but haven’t finished them yet.  I agreed to coordinate a friends wedding over the summer so that was the end of blog writing!  Here’s a fall post to start to catch up.  I was in charge of organizing our Co-op’s fall party today (ages range from 2.5 – 5yrs old).  I wanted to make it autumn-ish, not Halloween-ish.  We had fun and it was a beautiful day to be outside!

Day of Prep

It took me 40 minutes to hang the Piñata,  hide the apples around the playground, and set up the craft table.  If you are not skilled in hanging bear bags or throwing rope over a tree limb give yourself a bit more time.

Activities

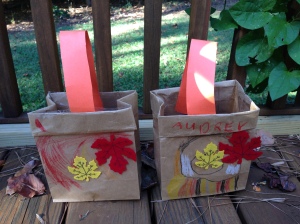
Fall Treat Bags:  As the kids arrived they decorated a fall treat bag.

Fall Treat Bags

Supplies:

  • crayons
  • package of felt leaves from the dollar store,
  • 30 cent large brown lunch sacks from the craft store (tops rolled down a couple times)
  • solid orange construction paper or scrapbook paper for the handle.
  • Glue for felt leaves (tacki-glue is my favorite. Dries in 30 seconds. Elmers is too messy and glue sticks don’t hold!)
  • Packing tape to tape handles on for a quick option other than glue

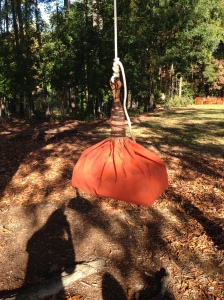
Piñata: Next we lined them up and they all took turns swinging at my homemade pumpkin Piñata. Not the best looking pinata ever but the 5yr olds thought it was great! They just wanted the candy inside :D.  And my girls enjoyed helping make it. I didn’t intend to DIY but trying to find a fall-ish, non-halloween pinata for less than $30 was impossible.

Homemade Pumpkin Pinata

Supplies:

  • 2 paper grocery bags, brown yarn, orange paint, and brown paint for the DIY Pumpkin Piñata. I used 2 brown paper grocery bags and put all 4 handles together at the top for extra support.  I think it would have been too heavy for one bag. My kids painted it orange and brown. This would not work for older kids unless you blind folded them so they didn’t get direct hits every time. We had 2 older siblings there (age 10 and 13) and it took them 4 solid hits to break it open after the younger kids had all had turns and were ready to be done.  The younger kids barely tapped it.
  • 4 kinds of candy (enough for about 6 pieces per child), a pencil (Dollar store), and some individual packs of raisins.
  • 30-50 foot rope for hanging.
  • Stick or bat for beating it.
  • Bucket for collecting treats once it breaks (we had the kids gather up all the items/candy into a bin and the mom’s sorted it equally between the treat bags).

Apple Hunt: the kids played this last as the mom’s sorted candy and made lunch plates for the kids.  Supplies:

  • Apple cards.  I printed several copies of this for the 2-3yr olds so each child could find at least one.  I tapped the dots up on the fence and hid the numerical ones around the playground. They had to find them and match up to the dots on the fence.   For the Kindergartener’s I covered up the numbers/dots and renumbered them 1-20. They had to put them in order along the fence.
  • tape

Food Menu:

Apple Cupcakes

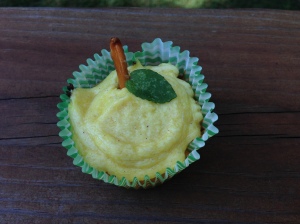
*I made these, pictured above.  We used green striped wrappers (Walmart) to mimic hanging on a tree, yellow coloring because we were out of red, and mint leaves from our garden for the leaf. Use your favorite cupcake recipe or make apple cupcakes with cinnamon flavored frosting! I think my new favorite thing is to put cinnamon in frosting.

What are you doing for your fall parties? Any other non-halloween ideas?

Kindergarten Curriculum

Kindergarten has started! This is our first week and so far it’s gone great. I’ve had several folks asking me what curriculum we decided to use for Kindergarten so I decided to just post it.  People, there are way too many options out there! It got overwhelming trying to compare all the curriculum plus figure out what method we liked. So we decided to wait until first grade to pick a multi-subject all-in-one curriculum. Instead we made a list of learning goals and picked things to help us accomplish them. Really, in my opinion, kindergarten goals are simple: learn how to memorize and learn, phonics and reading, conceptual math, gross motor development, and life skills. I like the idea of introducing what history and science is and doing a few fun activities and experiments. However, we’re saving the more structured curriculum for another year. Maybe next year, maybe never.  We’ll see how our pull from here and there method works out for us! Who knows, we might love it best in the end.

Resources

These are things that have informed our choice of subjects and books. Most of them I was able to check out from our local library to look through before buying a copy.

– The Well Trained Mind.  Like the idea of the trivium, not sure about the heavy fact memorization or latin. It’s something to look into for 1st grade.

The Three R’s by Ruth Beechick.  I’ve been using some of her tips for teaching reading and it’s helped a lot.

Honey for a Child’s Heart by Gladys Huntington (for teaching literature concepts and book lists)

10 Things to do with your child before age 10 – by Harvey and Laurie Bluedorn

Subjects and Books:

1. Phonics, daily: We are using Horizen’s Kindergarten Phonics & Reading.  My daughter loves anything silly so Horizen’s is a great fit. They have lots of made up words to read and silly phrases to read and match to pictures.  This has helped endear her to the idea of school. We only do 1/4th of the writing required since I want to use copy work to assist with memorization. The other one we considered is Learning to Read in 100 Easy Lessons. It was simple and cheep.

2. Reading, one pre-reader level book per week: We are going to make a trip to the thrift store or library at the beginning of the month to pick out 4 new books. I’ll sneak in a few that I want her to read but mostly I let her pick a few on her own. There are hundreds of options on every topic known to man.

3. Math, daily: We are using the Singapore Earlybird Kindergarten textbooks A and B.  We are using it without the activity and teachers books.  I like how this is heavy on simple concepts she already knows at the beginning and works its way into new and harder things.  It is also very hands on with minimal writing. This is good because this year is all about getting our feet wet and learning to work hard! For counting I found a 100’s chart and a dot to dot book.  We’ll mix this in around the Singapore lessons.

4. Copy Work: each week I’m picking a “copy work” assignment.  I’m going to pair this with whatever she is memorizing at the time. The basic concept is that she copies something either from a book or from something I’ve written down for her. If it’s longer than a couple sentences she will work on it for several days.  I let her pick out a fun composition book for this.  She uses two lines for one word to make it more kindergarten large-writing friendly.

5. Memorization, daily: I’m picking one memorization goal per week.  We are starting out with basic things like numbers 1-100, counting by 10s, address, phone number, months of the year, knock-knock jokes, and short bible verses.  Later in the year we will move on to longer things like songs, children’s poems, counting by 5s, puppet show scripts, and other fun things we come across. I’m doing a mix of using lego blocks with words attached (stack in order), copy work, and saying it out loud several times to help her memorize things. I found this article  helpful on teaching memorization.

6. Bible: The Long Story Short by Marty Machowski. My husband does this with our girls during breakfast.

7. Other “electives”, two times per week: These are things that are negotiable in my book.  You can pick and choose whatever you think will best fit the interests and goals of your child. We chose science, history, art, P.E., and life skills. I haven’t planned it all out yet but in general we picked 1 life skill, 2 science lessons, 2 history books to read, 2 art projects, and 2 P.E activities per month to focus on. The life skill we will work on all month.  Music, theater, and puppetry, story telling are other artistic things you could substitute for art if your child isn’t into painting and drawing.  Here is our list of ideas!

Science: two lessons per month.  Primarily reading books to them and doing lots of hands on experiments/simple projects.  We are picking lessons based on the four categories mentioned in this free Science Discovery Curriculum .  We will spend 2 months on each of the four categories. We will read a book and do one of the activities/experiments.  Here are a few other references I’m using.

Mudpies to Magnets.  This was recommended in the Well Trained Mind.  There are a few things that look fun but it’s probably on par with every other book of science experiments out there.  We will probably end up primarily using the one above.

Let’s Read and Find Out Science Series.  I love these books! Lots of colorful pages with well laid out simple facts. Everything from Why Do Leaves Change Colors to Planets and the Moon to different animals and habitats.

~ The Listening Walk by Paul Showers as a platform to talk about observing the world around us.

~ About Habitats Series by Cathryn Sill

~ Ocean study (memorize where they are on the map)

Moon Phase Wheel (we made this with brads and poster board wheels so they could change it each night).

Cloud Window  we made this last year in our Preschool Co-Op and our girls still use it.

~ In general, most of the books we read I pin on my K5 board

History: Read two books per month themed around people in different places and times. I raided our books on hand first and will fill in with library or new books as needed. As you can tell, there is no real pattern.  We will discuss whatever topics come up in the books. Structured history and timelines and projects are for another year.

– A House Is a House for Me by Mary Ann Hoberman (start of the concept of everyone has different places and homes to live in).

~ A book on each of the 7 continents

– Keep the Lights Burning Abby by Peter and Connie Room.  A great story about courage and responsibility.

– Dave the Potter by by L.C. Hill (probably pair this with art that week and make clay things).

– Snow Treasure by Marie McSwigan

-The Librarian Who Measured The Earth by Kathryn Lasky

– The Story of the Pilgrims by Katherine Ross

– One Giant Leap by Don Brown (probably read this during the month that we do a lesson on the moon for science)

– How To Make an Apple Pie and See the World by Marjorie Priceman (talk about different continents)

– How to Make a Cherry Pie and See the U.S.A by Marjorie Priceman

– Growing up Where Jesus Lived by A. Beka Books

– Mother Teresa book (talk about compassion and serving the poor)

If you lived in Colonial Times by Ann Mcgovern (this would count as both books for the month because it’s long).

Next Spring an Oriole by Gloria Whelen

– There are also a list of good non-fiction books to read to 5yr olds in Honey for a Child’s Heart. I haven’t look through them yet.

– Some of the other On My Own History titles

ArtWe have a artist in the house! Our 5yr old has been doodling since she could first use a crayon.  She will draw, paint, and play with play doh by the hour.  Our goal this year is to teach her a bit more about technique.  Next year when she is a bit older we’ll transition this into formal art lessons and use Charlotte Masons art history/appreciation units. Since I’m not an artist I am pulling my ideas for art projects primarily from Emphasis Art (7th edition and later  has K5 ideas, editions 1-6 do not). It includes drawing, painting, and sculpting project ideas for kindergarten through 5th grade.  Some other art books to read/use:

Make a World by Ed Emberley. My daughter has spent hours drawing things out of this book.

-The Art Lesson by Tomie dePaola

-Ish by Peter Raynolds – for the perfectionist child (project: learn about lines. Make ish drawings using different kinds of lines)

PE: Learning to swim using the uswim level 2 lessons, Tumbling, kickball, tennis, jumping jacks, and hop scotch (learning to hop on one foot) are on our list so far. Pretty much anything that encourages gross motor development and gets us outside.

Life skills

-Chores: Sweeping, raking, unloading dishwasher, cleaning the bathroom sink, putting away laundry without supervision.
-learning to follow a simple recipe/how to measure
-learning about what money is
-picking out ripe veggies/fruit at the grocery store
-Using a hammer and nails, make a wood box with Dad.
– Fire Safety
-Whatever other fun things we dream up.
Toy Travel or Storage Bag

Toy Bag

Today I was looking around for a quick birthday gift to make for a friend’s son and found my new favorite quick-gift: a toy bag!  It’s technical term is a swoop bag. It was described as a lego bag but you could use it as a travel bag for any kind of toy.  Or for organizing any toy with lots of parts to it.  I’m going to make a large one to keep our girl’s doll house pieces in.  And then make some more travel size ones for our nephew’s and niece’s upcoming birthdays.  It would also make a great travel bag for me. Hmm.  The ideas are endless.  Did I mention it’s my new favorite thing to make?  It’s the little things…

Original Pattern: Lego Sack from Make It Perfect. If you are going to make this bag, you need to read this post first.  Below are just a few things I adapted from the original instructions.

My adaptations. 

Most of the adaptations were because I only had an hour to make this and was trying to cut out some steps to save time. It worked just fine doing it this way so I’ll probably just keep making them this way.

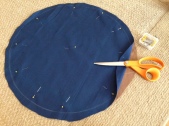
[1] I cut a fabric circle that was 18.5″ in diameter.  I wanted a small travel bag for legos not a huge storage bag. If you make this size, put the button holes only 1″ from the edge of the fabric, not 2″.  I didn’t think about that until later and ended up with more fabric above the cinch casing than I would have liked.

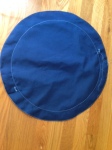
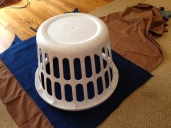
[2] I skipped cutting a square and cutting the pieces individually.  Instead, I pinned my fabric right sides together and used my laundry basket as a stencil to trace a circle.  I eyeballed and cut it out a 1/2″ above the line I traced (through both fabrics at once). I used the line as my sewing guide (after doing the button holes).

Laundry Basket Stencilremove one pin to sew button holes in lining.

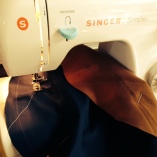
[3] I kept the fabric pinned together when I sewed the button holes. So I wouldn’t have to line it back up again.  I took out one pin and folded back the outside fabric to sew the button holes in the lining fabric. (The blue fabric is the lining).

Sewing button hole in the lining.

[4] Once you have the button holes sewn, sew both pieces together along the traced line (leaving a turn hole open) and then follow the blog post instructions linked above to turn it right side out and finish the project.

Here is what it looked like after I had sewn, turned, ironed, and top stitched it:

Turned and With Casing Seam Sewn


[5] Finally, I used ribbon instead of sewing ties because I ran out of time.

Homeschool Planner

Weekly Homeschool Planner

Our just-turned 5 yr old is starting Kindergarten in the fall! For various reasons, my husband and I have decided to start our children’s education off by homeschooling.   How far along in their education will we homeschool? Ask me again at the end of Kindergarten.  Or maybe first grade 🙂 I do love the idea of it but the thought of teaching upper middle and high school grades makes me nervous. We shall see…

Since fall and the first day of school is quickly approaching I’m starting to think about school planning.  Now, I am one of those check-list/spreadsheet loving people.  I like seeing things neatly organized and being able to check off my progress.  It keeps me on track through my days and weeks.  Thus I’ve been looking around for a simple, already-made planner that we can use for school planning.  After looking at several that were way too complicated for Kindergarten I came across this Homeschool Planner.  I like that it is created to be editable and the way they set up the year/month at a glance pages.  What I really like is the clean looking weekly school/chore checklist with sections for each time of the day!  We generally start things at  the same time each morning but not always so  having things broken out for morning/afternoon/evening (instead of specific hour by hour planning) will be helpful!  I’d probably print this out, laminate it, and use dry erase markers to update it each week to save on paper.  And change the “I earn” to “evening” since our girls have a after dinner chore.

I might poke around a little bit if I have time to see if there is something else that would work that is free.  But so far I’ve turned up nothing as nice as this one.  Do you have any recommendations for a planner you like that is similar to this one? Free or not free?

If you decide to purchase this one use the link above to give me referral credit 🙂

Camping with Young Children (Gear+Activities)

Earlier in my life I wouldn’t have believed you if you had told me that one day I would count a box fan and electricity as necessary camping gear.  Our backpacking trips have trickled into our camping habits and we don’t like setting up a ton of stuff.  But one thing we’ve learned camping with littles  is that if the toddler isn’t comfortable, they aren’t going to sleep.  And if the toddler doesn’t sleep, nobody is going to be having any fun.  Thus, we’ve added a few luxuries to our list of essential camping gear to help make it easier on our kids.

The list and tips below are geared towards a family of 5, camping with kids under the age of 6. This was our packing list for taking our 5yr old, 3yr old, and 5month old camping for 3days/2nights.

Happy Camping!

To Do

1. Plan a light schedule.  You have to assume that the majority of your time camping with young children will be spent feeding them, getting them to sleep, and making bathroom dashes.  We will do hiking or exploring activities in the morning and then just swim or play games around the campsite later on.

2.  Along those lines, include meal prep in your list of family activities. Eating leisurely meals around the campfire is one reason why we love to go camping.  So we plan our schedule to allow in plenty of time to let the kids be involved. With supervision they can help fill the pot with water, collect fire wood, set out dishes, and cook food on roasting sticks. They love being involved and this keeps them busy while waiting on food.

3. Campground/camp site choices We like to pick a campground that is shady and has at least one fun thing to see or do: either sightseeing hikes or swimming.  The best hikes are ones with a shallow swimming hole at the end of it. We choose a campsite that is 2-3 sites away from a bathroom.  Close, but not too close.  We’ve found that the noise of people coming and going wakes our kids up and we’d rather run a bit further for the bathroom than deal with fussy/tired kids getting woke up!

4. Acclimate the kids to sleeping out doors before you go.  Try some back yard naps in the tent or take a couple of one-night trips. If you will be camping for more than one night, getting them over the newness of sleeping in a tent before you go might help everyone sleep better when it counts.

4. Make rainy day plans ahead of time.  Take things you can do in the tent or find something local it would be fun to see.  If it’s going to be hot, spending time in a tent during an afternoon rain isn’t always a great idea.  Especially since keeping your fan plugged in during a rain storm may not be feasible.  We look for a local indoor place it would be fun to explore, an indoor pool/YMCA, kids movies playing at the theater, or a sheltered pavilion we can take games and puzzles to.

5.  Plan nature activities for the afternoon/evenings around the campsite.  This is especially helpful for times when my husband and I are trying to set up/pack up camp. Here are my favorites I’ve done in the past:

  • Tongs and a bucket.  It’s amazing how much fun kids can have with these collecting rocks, twigs, and leaves around the campsite.
  • A magnifying glass and/or binoculars
  • A ream of paper with colored pencils or kids markers (for leaf rubbings, color leaves or sticks with markers, nature scavenger hunt lists, drawing, writing down fun memories to remember later, paper airplanes).
  • Paper can also be used to make targets for rock/stick/airplane throwing games.
  • Water guns (and a bucket for filling them up).
  • Twine or yarn.  Great for lashing sticks together to create things. Or you can string it between two trees and clip the kids artwork to it with clothes pins.
  • T-shirt and T-shirt paint.  You can use sticks and leaves as stamps by outlining them with paint and pressing onto the T-shirt.
  • Bubbles

To Take

Here are a few things we found essential for camping with young kids.  At the end is our camping checklist.  We keep most of these items in a bin in the back of our closet so we can just grab and go for quick overnight camping trips when a beautiful weekend pops up. These things are included on the checklist below.
1.  Camp beds or super comfy quilts/sleeping bag pads.  A well rested family is a happy family!  Since we go camping often, we invested in REI’s Camp Beds  and oh what a difference they make!  Well worth the price.  We only paid $25 each for ours but I’d pay full price in a heartbeat when ours wear out.

2.  Waterproof pads and extra blankets.  Our kids sleep on top of their sleeping bags and we take blankets for warmth.  We got some waterproof top-of-the-bed pads that they can sleep directly on to help prevent accidents on sleeping bags.  We also take extra blankets, just in case.  Even if they are wearing pull ups we use these because pull ups are not fail-safe.  The last thing you want is to have to wash out a sleeping bag while camping!

4. Box Fan (pick a campsite with electricity).  At one point, I would have scoffed at bringing a box fan camping.  But now I count it as helpful because a little breeze makes a world of difference in trying to get kids to sleep. It also acts as a great noise maker.
5. Buckets.  We use buckets for lots of things.  Washing dishes or mud out of clothes, sponge baths for dirty kids, and toting toiletries to the bathrooms.  We also use them for water fun to help the kids stay cool. They splash in them, wash rocks in them, fill water guns, all sorts of fun.

6.  Travel Bed and a Fleece sleep sack for infants.  We were given a Eddie Bower Travel Bed at a baby shower and we’ve found it perfect for camping with a baby (found at Target and on Ebay)!  It doubles as a changing station during the day.  We fold up a thick blanket into fourths and put the bed on top.  We also love the Halo Fleece Sleep Sacks for infants and toddlers too small to use a sleeping bag.

7.  Soft music on our phones.  Our kids can’t resist falling asleep to music.  If they are really struggling to settle down we’ll put on some music and they will be asleep within a few minutes.

8.  Quick Drying camp towels and washcloths.  We invested in these because we are constantly in need of towels and washcloths.  Regular towels take too long to dry and too much room to take extras.

9. Swim suits. Even if the campsite doesn’t have swimming (or it’s too cold) take swim suits to use in the shower.  Our kids are terrified of the camp showers.  So we put on swim suits and go into the shower with them.

10.  Wool or Fleece sweatshirt/hats for warmth if it will be chilly.  Cotton is pretty worthless to keep you warm while camping.  Unless you have 4+ layers of it.  Fleece is our favorite.

Check-List

General Gear:

  • ___Tent
  • ___Footprint or Tarp for under tent
  • ___Camp Beds and sheets
  • ___Waterproof Pads
  • ___Blankets plus 2 extra ones
  • ___Pillows and favorite sleep items for kids
  • ___Infant Travel Bed
  • ___Infant Fleece Sleep Sack
  • ___Box Fan and outdoor extension cord
  • ___2 camp hand towels
  • ___bio-degradable dish soap
  • ___bio-degradable hand soap
  • ___pocket knife
  • ___hatchet
  • ___a 2-gallon size bucket or plastic bin for dish/laundry washing
  • ___nylon rope for a clothes line
  • ___20 clothes pins
  • ___Check or cash for campsite, wood, etc.
  • ___Headlamps with extra batteries
  • ___small dust pan and broom for tent
  • ___camera
  • ___phone and phone charger
  • ___nature activities and some books for the kids
  • ___camp chairs
  • ___portable booster for toddlers/bumbo for infants (we put these on a picnic blanket on the ground – picnic table seats are not stable enough)
  • ___picnic blanket
  • ___Food and cooking gear list
  • Water purifier pump or bottled water (if you are concerned about campsite water – always good to check with the Ranger first before giving to kids!).

Clothes & Personal Care:

Update 6.24.13 (after a 5 day/4 night trip):  The camping ground we went to had lake swimming.  We spend so much time changing in and out of swimsuits it was annoying.  And we also only used 1/2 our clothes.  Thus, next time I’m raiding the thrift stores and taking 3 swimsuits for each child (2 pieces so they can go to the bathroom easily), several comfortable covers, and laundry soap to wash them out with.  Maybe take 2 clean outfits each for going into town and the ride home but that is all.  Really, we spent 3/4ths of the trip in swimsuits! They pack so much lighter and are cooler to wear in warm weather than regular clothes.

We pack one swimming bag that has everyones stuff in it and then 1 backpack per person.  It helps to have the kids things separated individually!

  • ___ Life vests for swimming in lake/boating.
  • ___swim suits
  • ___5 camp washcloths and bath towels (1 set per person)
  • ___5 Beach towels for swimming (1 per person)
  • ___first aid kit w/ allergy meds, thermometer, and fever reducers (for both adults and kids). You really don’t want to be caught behind a locked gate trying to figure out how sick a child is.
  • ___Poison Ivy Soap/Calamine lotion
  • ___sunscreen
  • ___sun hats/glasses
  • ___bug spray
  • ___ Toiletries (including bar of soap/bath wash)
  • ___Rain gear for everyone
  • ___Fleece jacket and hat for everyone
  • ___1 outfit per day+few extra for everyone (see update above)
  • ___Sleepwear
  • ___water shoes for the shower/lake swimming
  • ___large canvas bag for laundry (something breathable so your laundry doesn’t mold/smell awful).
  • ___laundry soap (I put some in a small, empty hand soap pump bottle). In case of accidents since you don’t want a pee smell to haunt your campsite!
  • ___diapers/Pull-ups + wipes

Extras

We don’t take these items but if you wanted a bit more comfort or a nice looking campsite you could add them to your list.

  • Port-a-crip for a safe play zone for busy toddlers
  • Picnic table cover and clips
  • doormat for outside of tent
  • lantern
  • picnic table screen tent
  • screen food covers to keep bugs off
  • outdoor sting lights for making the campsite pretty at night
  • bug candles to keep bugs away